The factor that keeps boosting the Internet in general and hosting business in particular is that starting a new website has become a really easy thing that literally everyone can do now. One no longer needs to be a smarty-pants with a degree in computer science in order to kick off an online project. It is also possible that such project, run by a fast learning newbie, will stay on par with projects run by more experienced rivals and will neither fall short of design quality nor lack in functionality. Why? The answer is: one does not need to write website code from scratch anymore. In fact, one may not need to write the code at all. There are dozens of free open-source content management systems (CMS) which can be used right after 5-minute installation as well as allow plenty of modules, extensions and other customization tools that can be additionally installed and used later on. WordPress, Joomla, Drupal are the most popular (although the list is by no means exhaustive – many other CMSs are widely used and loved). Each of them has its fans, several hundred pages thick manuals and millions of websites run on them.
Today we will show how to install Drupal on cPanel. Why Drupal? Well, it is just as good as WordPress so the choice is more like a matter of taste and experience than “what is better”. Moreover, the installation process of one CMS is very similar to that of the others (which is but natural).
Drupal is a highly reliable enterprise-level content management system which went as far as being used for development of websites of the White House, NASA, the New York State Senate and many others governmental, commercial and non-profit organizations all over the world. It is distributed under GNU General Public License and therefore can be copied, modified, studied and used freely.
So, let’s start. First of all, we need to go to Drupal website https://drupal.org/download and download the archive. Now there are the following versions available: 4.x, 5x, 6x, 7x and 8x (alpha version). We will install Drupal 7.23 as it is the latest stable version so far. Unzip the archive. There should be a directory “drupal-7.23” with files and subdirectories (/modules, /profiles, /scripts, etc.).
Launch an FTP client (e.g. FileZilla) and connect to your ftp account. If you want to install the CMS for the main domain of the cPanel account, you can use your cPanel username as the FTP username and the cPanel password as the FTP password. If you want to install it for addon domain you need to use the password you have previously set for it and the username which looks as follows: addon@domain.com (where “addon” is the username for the addon domain and “domain.com” is the main domain of the cPanel account). You can find the addon domain username at cPanel > Addon Domains > Username column. The ready-to-use FTP username can be found at cPanel > Files > FTP Account > FTP Accounts.
Upload the contents of the “drupal-7.23” directory to the server. Alternatively, you can use cPanel File Manager for uploading the content (cPanel > Files > File Manager > Upload). Then go to http://domain.com/install.php. This will start the installation process.
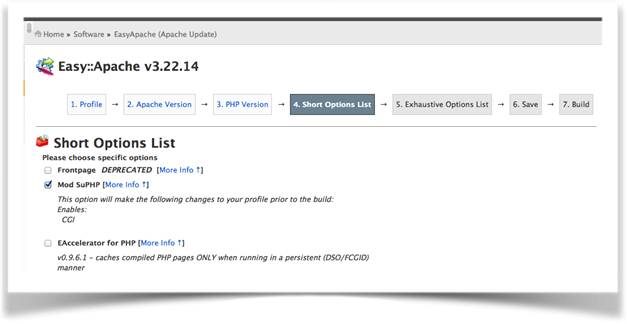
Choose Standard profile, language, and verify the requirements. If this is your first website on the server, and Apache and PHP have not been configured manually before, some Apache modules or PHP extensions might be missing. In this case there will be a warning on the pink background. In order to add the necessary modules and extensions you should use the special WHM/cPanel tool called EasyApache. Go to WHM > Software > Easy Apache, choose the first “default” profile, click “Start customizing based on profile”, select Apache and PHP version (if Apache and PHP versions have passed Drupal pre-installation check you should not change the already set versions). On the Short Options List and Exhaustive Options List you need to select the missing modules and extensions, and finally click “Save and build”.
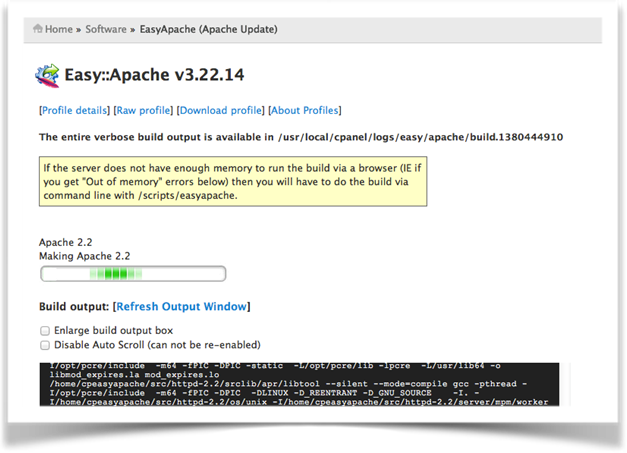
The recompilation may take from 10 to 30 minutes.
Once recompilation is complete, return to the Drupal installer and go to the next step, that is setting up the database.
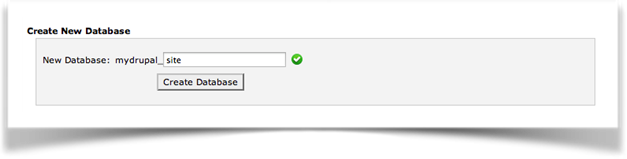
In order to set up the database, you need to create an “empty” database, a database user, assign the database to this user and set the permissions. Go to cPanel > Databases > MySQL Databases > Create New Database, enter the database name and click Create Database.
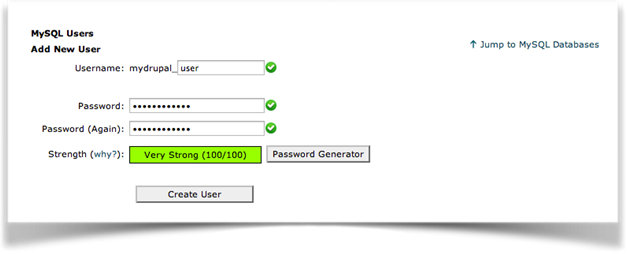
Having done that, create a new database user and set the user password.
Finally, add the user to the database
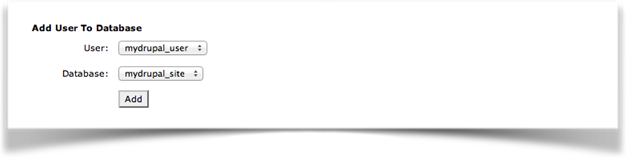
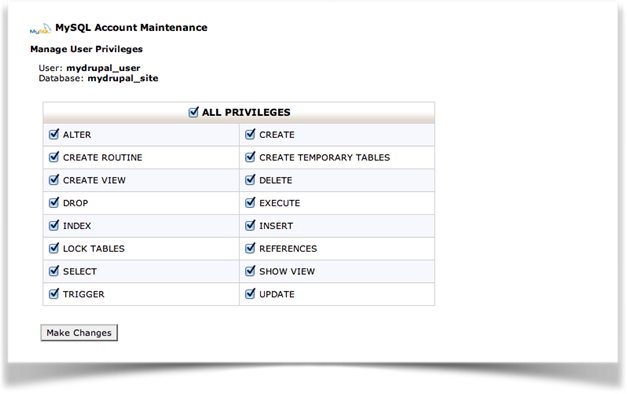
and set the permissions (ALL PRIVILEGES).
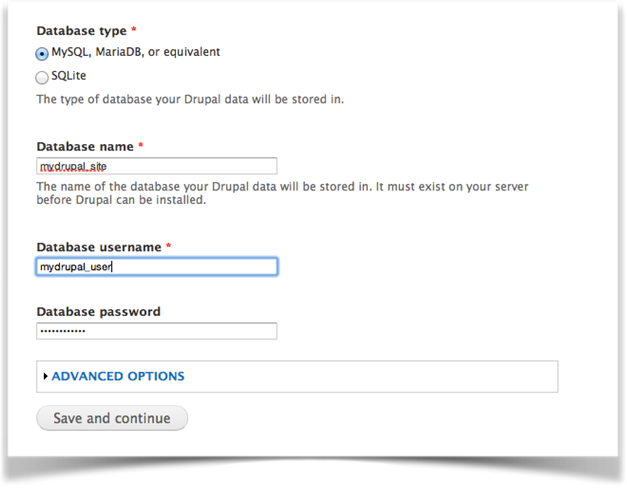
Return to the Drupal installer, choose “MySQL, MariaDB, or equivalent”, fill in the text boxes and click “Save and continue”.
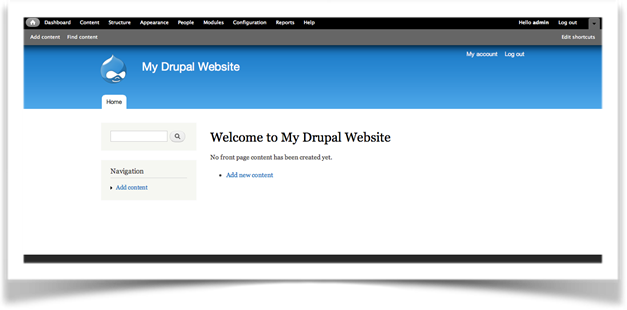
Congratulations! You have just installed Drupal. All that is left is to configure the website. You need to enter the site name, the site email address, set up an admin account and choose other settings.
Looking for hosting for your website? Take a look at our cheap vps server hosting offers.